Hellooo. I know I just finished Pokemon Red which wasn't a very long game, but I feel like playing something else (kind of) short, sooo here I go.
Yaaay, this is a nice game. I'm okay at it I think, but I also don't think I've ever actually completed it before. So we'll see how this ends up working out. First thing we have to do is choose a name for our character. I was going to give him another name, but since "Link" is actually in the title of the game I'll keep with the standard for this one.
To start off, we wake up next to a strange woman and don't remember who she is or how we got here. Oh, but she's not in the bed. She's standing off to the side. Her name is Marin and she tells us we have found ourselves on Koholint Island. Hop out of bed and speak to her again to find out she found Link washed up on the shore south of the house. Talk to her father Tarin to receive your
Shield.
You can wander around town a bit ant talk to the people here. A couple of kids tell you about the save feature and then say "But I don't know what that means, because I'm just a kid!" Nice try, but you're still breaking the fourth wall there.
In the house to the north there's a man who will outright tell you to keep an eye out for him because he's going to be lost later on, and his wife will tell you that her baby wants a Yoshi Doll. I'm pretty sure that your baby is a baby and has no specific material desires, lady. We all know who really wants the Yoshi Doll around here. Also I guess the kids running around talking about the save feature belong to these two, because they both mention having several sons but there's no one else in the house.
When you're ready to head out go west to the screen with a well and then south. You'll pass by some more kids with some fourth-wall breaking tips, and a house full of books that offer information on various items and features in the game.
Go south two screens and then west, passing by these little red guys (called octoroks). You have nothing to smack them with at the moment, but you can push them aside with your shield and deflect the little rocks they spit out. Jump down the ledge here.
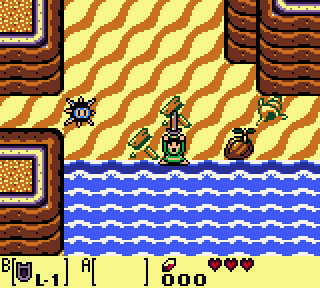
Hold out your shield (you must hold the button down) and push one of the sea urchins here out of the way, then go right and do the same with one of the two here and exit south. After a bunch of dialogue happens you will be able to step into the water and re-claim your sword.
Hooray! Now the true adventuring can begin! Wander around and smack some octoroks and cut down some shrubs if you want, then head back northwest toward the village. When you come across the well again, cut down the shrub directly above it and hop off the ledge to end up inside. You will find a
Piece Of Heart (1/4). There is also a few small things to do back in the village, but a couple of them require some Rupees (the blue gems you find when you cut down grass or kill an enemy).
Two screens north of the house with the chain chomp you will find a man who will let you fish for 10 Rupees. The bigger fish in the lower-right has a
Piece Of Heart (2/4) inside of it, and you'll get a prize of
20 Rupees on top. The smaller fish will award you 5 Rupees each. If you catch a small one and opt to try again you will have to pay another 10 Rupees, however once the one at the very top is out of the way you should be able to get to the bigger one fairly easy. Tap the a button every second or so to keep the fish hook bobbing on the top of the water, and hold down right so that it slowly makes its way back toward your target. When it's as close to the rocks as you can get it, let it drop down.
Head to the south-east corner of town to find a "shop" surrounded by shrubs. Inside however, instead of a store you will find the Trendy Game - a crane minigame. Each play will cost 10 Rupees but you can get various prizes. First get the
Yoshi Doll and save your game, and then go back and try for the small satchel which contains
Magic Powder. (This is optional, there is an easier way to get the powder but if you manage to pull off a successful grab it will save some time. After about two tries it's no longer worth it, though.) The timing can be fairly tricky because the crane arm closes very slowly, but after this we won't be using the game anymore (unless you want to try for some Rupee prizes, which are 30 each).
One screen up from the Trendy Game you will find a screen full of tall grass and shrubs. Cut down the second one down in the fourth row of shrubs and you will find a
Secret Seashell (1/20). Trim the rest of the foliage here as well if you want to find some extra Rupees. Head north a couple screens and west into the young couple's house and give the woman your Yoshi Doll. She'll give you a
Ribbon in return. Before you leave the village, go into the doghouse by the chain chomp and give the small chomp in here the ribbon in return for a can of
Dog Food.
The next item in the trade sequence are actually available to us right now but we'll be heading in that direction soon enough. For right now return to the screen with the well and go north, now that you can cut down that bush sitting in your way.
Thank you, Mr. Annoying Owl-Guy. North of here you will encounter a new type of enemy - moblins. They take two hits to kill instead of one, but still not incredibly tough to deal with. From here, go one screen north and two screens east to find a cave. Inside you will find the bat-like Keese which will fly around and try to knock you in the holes. If you stand still for too long the cracked ground will crumble and you'll fall into a pit. Break the blue crystals in this first room and the push the stone slab left or right out of the way (depending on which side you've ended up on) and open the chest here. You'll get
50 Rupees.
If you got the Magic Powder back at the Trendy Game, skip to the second line of dashes.
---------------------------------------------------------------
Go north into this next room. Follow the narrow path, being careful of the two zols who pop up here, and into a chamber with a small and simple maze of rocks. From where you enter push the one directly beneath you down, then walk left and push the other one down too. Exit the other side and get a
Toadstool from behind the shrubs (it will not appear while you are holding Magic Powder).
Go back inside - getting back is a bit more tricky. Notice the four rocks that make a diamond shape on the right side. Push the bottom, then the left-most, then the top one all to the right, then the one that was directly above the top rock upward. Return to entrance of the cave (note you cannot get this piece of heart yet).
From here go up two screens, then right a couple more (the map will turn light again) and then south two more. Don't try to attack the green squishy guy on the way. You can't kill him and you will get hurt if you try. Go right one screen and you will see a sort of spooky-looking tree which you can enter, so do so. Equip the Toadstool to your A or B button then go up and rub it on the witch's face. She'll give you some
Magic Powder which you can test out immediately by using it to light the torch beside her.. For sake of instruction-giving, I am going to suggest you head back to the cave entrance. It's not that far off from where we need to go anyway.
-------------------------------------------------------------------------------------
Go back west one screen and then north. You will find a red racoon here, and if you try to continue north he will laugh at you and say that he's going to cause you to get lost. He will make it so that you loop into a different screen and be unable to reach your destination. To fix this, sprinkle him with some of the magic powder and he will flip out and explode.
Apparently, it was actually Tarin - the guy who gave us our shield. Seems the guy just wanders around gloomy forests biting into mushrooms. Go north now and open the chest here. You will get the
Tail Key and then the owl will come to hoot uselessly at you.
When you've done that head back to the grassy area between the village and the beach with a bunch of Octoroks roaming all through it. Go east a couple screens, then take the lower path back west, south, then east again.
Stand in front of this statue and press up, as if you're going to walk into a doorway, and you will unlock the gate. Let's head on inside!
Level One: Tail Cave
Dungeon Map
First dungeon! Yaaay! Head west a screen and knock the two hardhat beetles down into the pits to make a
Key (1) come down. If you want, you can go left again for a room with a treasure chest containing the
Compass. There are four torch stands around the edge of the room that will shoot fireballs at you, as well as four green slime enemies here called zols. These will pop up out of the floor when you approach the chest and can be killed in one hit. You will
have to kill them because the door closed behind you and it will not re-open until they are defeated (a common occurrence). Once they are all wiped out, the torch traps will stop spitting fire at you as well.
Whether you got the compass or not, head back east. In the first room, our only option now is to go north. Wipe out the two mini-zol here and knock the beetle down a pit, then step on the button to the north. Open the chest for another
Key (2). You can head east here for a room where you have to kill all the enemies to reveal a chest containing the
Dungeon Map, but if you do collect it return here when you're done. Head to the left and simply take out the four keese here to open the door, then proceed north. Kill the moldorm here to reveal a chest with
20 Rupees, then go north again.

In this room you encounter a simple blade trap. Head upwards toward it but
don't walk directly in front of it. It will slide toward you quickly until it hits the edge of the pit. As it slowly makes its way back left, go up
past it and open the door (-1 key).
In this next area, loop around to the north-west, killing a couple
mini zol on your way if you want. Once you get there the door will slam
shut. Simply stand to the left of the westernmost block sitting apart
from all the others and push it to the right.
In this
next room you will find two spiked beetles that will rush at you if you
stand adjacent to them. Hold up your shield and when they hit it they
will be flipped onto their backs allowing you to kill them (again there
is an owl statue that tells you this). When they are defeated, take the
stairs downward. Here you will find... Goombas. And yes, you
can
kill them by falling off the ledges and landing on their heads. Go down
and up the ladders in these couple rooms and take the way up at the end.
Go north two rooms, avoiding the traps, and you will get the
Roc's Feather! One of my favourite items! Equip it and you can now jump. Backtrack all the way to the room that had the mini moldorm and go right to see a chest being circled by a
spark. Duck in as it moves off to the side and open the chest for a
Key (2) and exit from the top-right of the screen. You can now circle
around to a room with a hardhat beetle to bully and a block with a
keyhole. Go through here (-1 key) and continue west to a chest
containing the
Nightmare Key.
Head back to the
room with the spark chest and exit from the lower right. Go through the
doorway to the east here (-1 key). It will lead north to
an optional room where you will find an enemy called "three of a kind"
who have
the four playing card suits rotating on their fronts. You must strike
them with your sword to get the rotation to stop and match all three
suits, at which point they will explode. A chest will appear with a
Stone Beak allowing you to inspect the owl statue to the north for a hint.
Whether you get the beak or not, jump east across the pit in the room you unlocked end continue this way for a room with a miniboss.
This guy is called "Rolling Bones." This is pretty simple stuff, though you still have to be careful
naturally. Jump over the spiked log it tosses at you and then smack it
with your sword. Try to get a charged shot in there if you can. If you get between him and the pillar and keep swinging half of the time he will keep jumping into your sword, though pay attention to his angle so you don't get pounced on. Collect
the
Fairy when you're done to fully restore your health.
Head north now and avoid the
traps as well as the staircase - it leads to an empty (but foreboding)
chamber. Open the door at the top and find our first boss.

Here we are with Moldorm! He wriggles around the room kind of erratically, just try to stay out of his way and smack him with your charged up sword attack. Unlike the smaller versions, you must hit him in the tail to do damage, not the head. If he knocks you down into the pits you will have to climb the ladder and come back to start the fight all over again. What I found to work best was standing in the north right up against the closed door, with my sword pointing downward. He just ran into it until he died. He did push me a bit, but just try to be quick with your Roc's feather and jump back to safety. You will get a
Heart Container when you are done, it will take about four hits.

Hooray! Our first magical instrument! You can't actually utilize these in any way, you just have to collect all of them in order to be able to access the final dungeon. So yeah, too bad. We're done here, so let's proceed to the next portion of the game!
Go to part 2 --->


No comments:
Post a Comment